How to Install Artificial Turf Yourself (And When Not To)
Step-by-step DIY install — the actual process, tools you need, costs, and the four times where hiring a pro saves you money. Written by people who do this for a living.
Yes, you can install artificial turf yourself. We install turf for a living and we'll tell you straight — for a flat, simple, sub-400-sqft yard, DIY is reasonable. For anything bigger or weirder, the math usually flips toward hiring. Here's the full picture.
The honest math
For a 400 sqft DIY install in Salem-Portland:
- Turf: ~$1,800 (premium grade from our catalog, supply-only)
- Base aggregate + sand: ~$350
- Edging + stakes + seam tape + glue + nails: ~$200
- Tool rental (plate compactor, sod cutter): ~$150 for 2 days
- Hauling sod away: $100–250
- Total DIY: ~$2,600–2,850
- Same install professional: ~$4,800–6,200
- You save: ~$2,000–3,400 + a full weekend of your time
That savings goes down fast on bigger yards because labor scales linearly but material doesn't. By 1,000 sqft the savings is maybe $3,000 on a $14,000 install — and you've burned three weekends.
When DIY actually makes sense
- Flat yard, under 400 sqft
- Easy access (no carrying material through the house)
- Soil drains reasonably (no clay)
- Single-piece install (no complex seams)
- You own or can rent a plate compactor + sod cutter
- You have a strong friend to help with the roll
When to call a pro instead
- Bigger than 800 sqft — labor savings shrink, error cost grows
- Slope or terrain changes — grading is harder than it looks
- Multi-roll install — seams are where DIYs fall apart
- Clay subsoil + chronic wet — needs proper drainage you probably can't spec
- Existing concrete or rock to demo — rent that jackhammer at your own risk
- Pet yard with multiple dogs — the smell-vs-no-smell line is install quality
- You want the warranty — most manufacturer warranties require professional install
The actual DIY process
Step 1: Plan + measure (Day 0)
Measure the area twice. Order turf at 10% over the actual square footage for cutting waste + seam allowance. Confirm roll widths you can fit through the access path. Order the turf2 weeks out so it's there when you start.
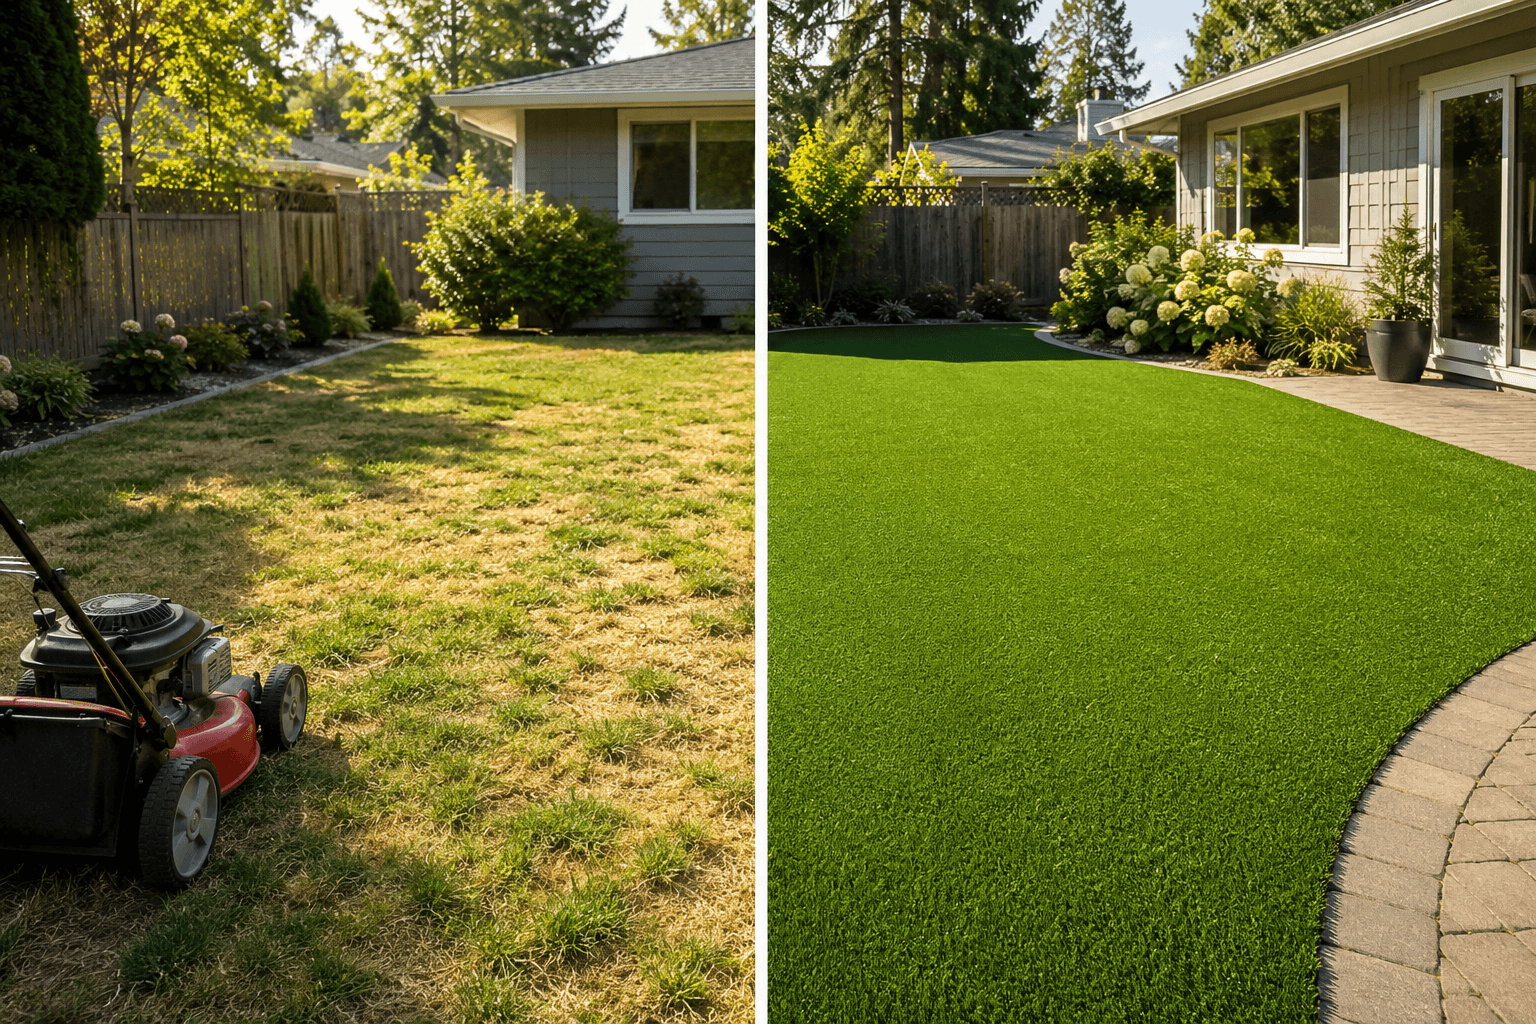
Step 2: Remove sod (Day 1, morning)
Rent a sod cutter from a local equipment yard (~$80/day). Set depth to 2 inches. Cut in strips, roll up, haul to a landscape recycler (~$30/yard). For a 400 sqft yard, expect 1.5–2 cubic yards of sod.
Excavate an additional 2 inches below the finished grade so the base aggregate + turf hits ground level when you're done.
Step 3: Install edging (Day 1, afternoon)
Bender board, paver border, or steel edge — pick one and run it around the perimeter. This is what keeps the turf locked in. Stake every 24 inches.
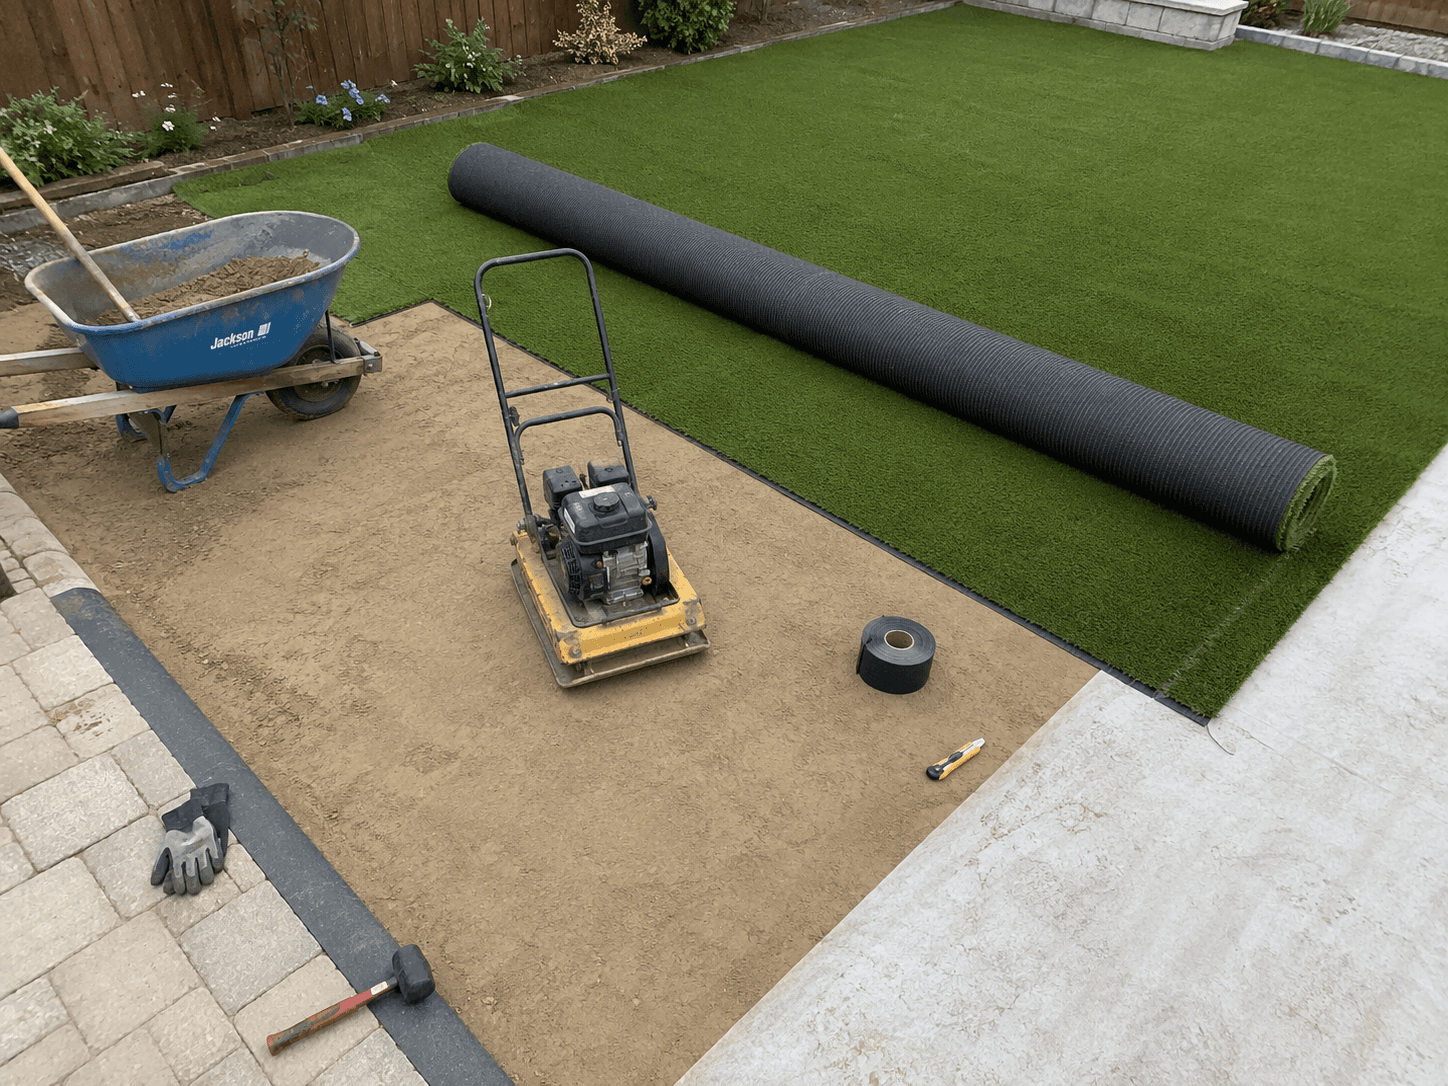
Step 4: Lay + compact the base (Day 2, morning)
Order 3.5 inches of decomposed granite (DG) or class II base from a local landscape supplier (~$45/yard delivered). Spread evenly. Water lightly. Rent a plate compactor (~$70/day) and compact in 2 passes — once after dry spread, once after light watering.
Step 5: Lay weed barrier (Day 2, mid-day)
Geotextile fabric over the compacted base. Overlap seams 6 inches.
Step 6: Roll out the turf (Day 2, afternoon)
Two people minimum. Roll turf out flat, all blades facing the same direction (matters for color uniformity). Let it sit 30 minutes to relax. Trim to fit edges using a sharp utility knife from the backing side, not the blade side.
Step 7: Seam any joints (Day 2, late afternoon)
This is the hardest part. Position seam tape under the joint, run a bead of seaming glue, fold turf edges in carefully so blades interlock, weight with sandbags for 24 hours. Get this wrong and your seam visibly splits within months.
Step 8: Secure perimeter (Day 3, morning)
Hammer 6-inch turf nails or landscape staples every 6 inches around the edge, every 12 inches across the field. Predrill if your base is too compacted to drive directly.
Step 9: Spread infill (Day 3, mid-day)
Silica sand (or antimicrobial sand for pet yards) at the rate the turf spec sheet says — typically 1.5–2 lbs per sqft. Use a drop spreader, then brush in with a stiff broom or power broom (rent for $60/day).
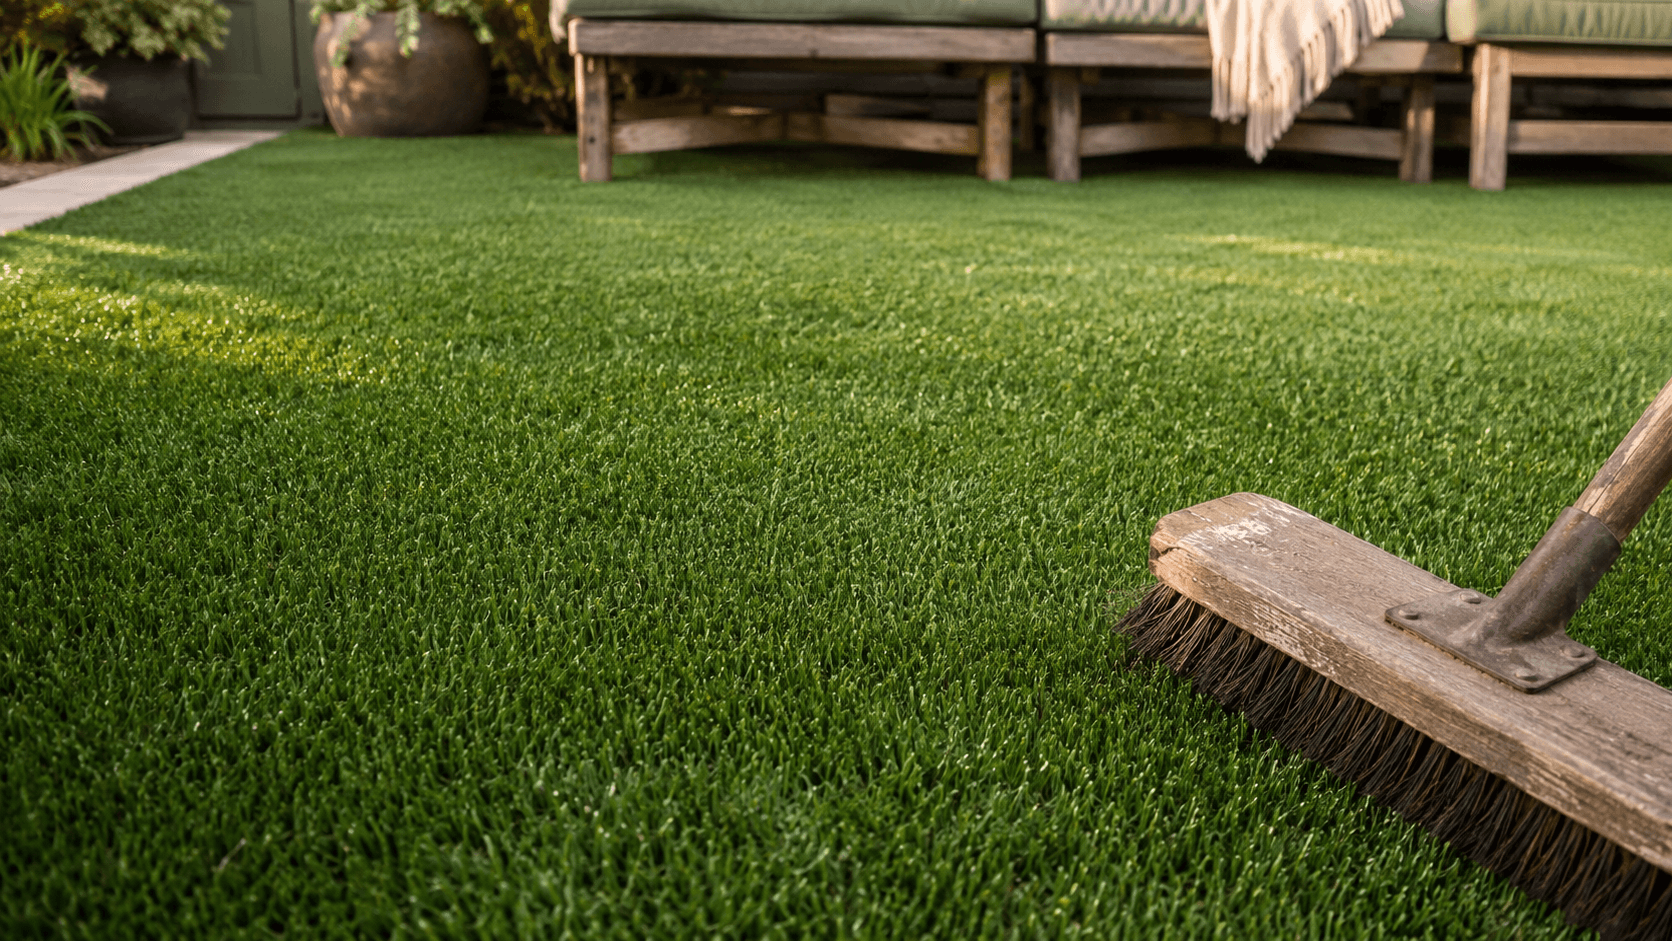
Step 10: Final brush + cleanup
Brush against the grain to stand blades up. Trim any stray edges. Rinse off the dust. You're done.
Tools you'll need
- Sod cutter (rent)
- Plate compactor (rent)
- Power broom (rent)
- Wheelbarrow
- Rake (heavy + light)
- Tamper
- Utility knife + extra blades (turf dulls blades fast)
- Hammer + 6-inch nails or landscape staples
- Drop spreader (for infill)
- Tape measure + chalk line
Common DIY mistakes
- Skipping base compaction — the install will ripple in 2 winters
- Cutting turf from the blade side — you'll see the cut line forever
- Wrong blade direction — color looks mismatched across seams
- Under-nailing perimeter — edges curl up
- Insufficient infill — blades lie flat and look fake
- Cheap seam tape + glue — seams open within 6 months
- No drainage prep — water pools, install fails
The supply-only option
If you want to do the labor but get pro-quality turf (with the manufacturer warranty intact), we sell turf supply-only across the Pacific Northwest. Same product we use on our paid installs — at trade pricing if you're ordering enough for a full pallet.
Or chat with Turfy 🌱about your specific yard — we'll tell you honestly whether DIY makes sense or if hiring saves you money.